Wednesday, April 13, 2011

Sneak Peak: Teacup Candles

Here's a sneak peak of our upcoming fundraiser, Teacup Candles. Profits will be donated to the American Heart Association in order to aid the tsunami/earthquake victims in Japan.

Further details will come later!


Thursday, March 24, 2011

8th, 9th, and 10th meetings

Sorry about not updating in awhile. School's been kind of hectic lately, but fortunately, tomorrow will be the last day before we start spring break! Alright, now for the updates

Eighth Meeting
We sewed baby hats again. I plan to donate the hats to an organization soon.

Ninth Meeting
We made friendship bracelets out of t-shirt yarn (a.k.a. "tarn"). Tarn is basically yarn that is made out of cut-up t shirts. You can find a tutorial here. The reason why we used tarn was because the string is thicker. Therefore, it takes much less time to finish a bracelet and the bracelet appears a lot chunkier. It turns out to look something like this:


*if you want your bracelet to look as chunky as these, try crocheting each of your strands. This will make them thicker.

Ninth Meeting
Today, I was inspired by my Martha Stewart book,

In the book, it listed a tutorial on how to make tissue paper flowers. I didn't take pictures for this meeting, but I did find the link to a tutorial on how to make one of the flowers in the book out of tissue paper here. Instead of using the floral tape, we used yarn and tape. Also, we used wooden beads as the center of the flowers. This craft is great for the springtime :)

Here are some pictures I found online to inspire other fellow crafters


Until next time and have a great spring break

Friday, February 25, 2011

5th, 6th, and 7th meetings

Fifth and Sixth Meeting: Baby Hats

The members sewed baby hats made from recycled old sweaters. We plan to sew more later and donate them to the Children's' Hospital. The members were also treated to some Valentine's Day-themed cupcakes.

I don't have actual pictures of the members' baby hats, but this will give you an idea of what we made:

*click on pic for tutorial

These are the cupcakes we snacked on

Seventh Meeting: Mini Owl Stuffies!
Using this tutorial, the members worked on a super easy, quick, and cute craft! They make a great beginner-sewing project, so don't be afraid to try one out yourself

Friday, February 4, 2011

Tutorial: T-Shirt Bag w/Braided Strap

Even though most of the projects we work on in the meetings are heavily based on outside sources, I'm proud to say that I have constructed a new project I can call my very own. Scroll down to find out how to make this bag:

Materials
-1 XL t-shirt (also depends on how big you want your bag to be, but I must warn you that fitted t-shirts will require some adjustments)
-pins
-sewing machine (you can also hand sew, too)
-thread that matches your t-shirt color
-fabric scissors
-tailor's chalk
-ruler
-flat surface and lots of room

Instructions
1) Turn your shirt inside out, lay it on a flat surface, and gather pins and a pair of fabric scissors

2) Cut off the sleeves and around the collar (cut collar about 2 1/2 in. from sleeves and 1 1/2 in. below collar). Then, measure 6 in. from the bottom of the shirt. Using a straight-edge and tailor's chalk, draw a line and cut. Leave your scraps to the side; you will use them later.
Optional Step: Pin a few cm. lower than where you want to cut. This will keep the fabric from moving while you cut (it can be a pain to cut fabric when it keeps moving


3) You are going to sew up the sleeves next, but don't sew about 1/2 in. or 1 in. at the top of the sleeve. If you are using a sewing machine, pin about 1/2 in. away from the edge of the sleeve.


4) Next, fold the bottom of the shirt about 1 in. Sew over fold twice. I did a straight stitch first and then a zig-zap stitch for the second time around

5) Mark the bottom corners on both sides like this:
Sew a straight stitch along the line. Cut off the corners along the sewed line. This will give your bag a less square appearance

6) Turn the shirt inside out. It should look something like this:


6) Take the scraps that you set aside earlier. Take the piece you cut off from the bottom of the shirt (should look like a wide tube) and snip off were the sides have been sewn together. You should now have one long piece of fabric

7) Cut the fabric into three even strips of fabric.


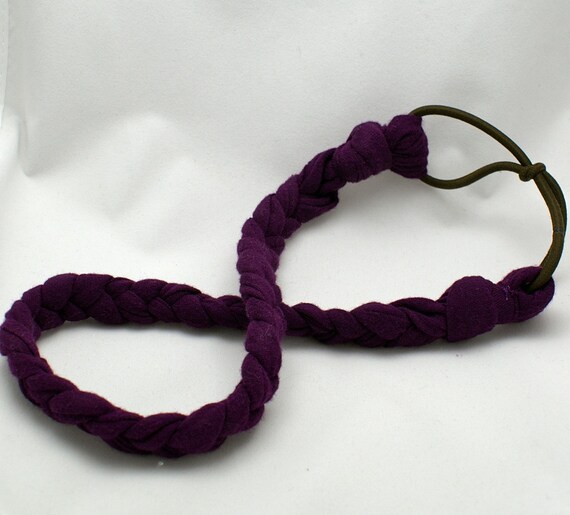
8) Tie a knot leaving about 3 in. at the end for fringe. Braid the strips of fabric until you get to the last 4 in. of fabric. Tie a knot. I like to attach the knot between my toes when I braid.


9) Using the fabric from the sleeves you laid aside, cut off the hems. After that, snip the hems in half so you have a thin strip of fabric

10) Take your braid and string it through the hole you left at the top of the sleeve. Make sure the knot is on the outside of the bag. Do the same to the other side


11) Using the hem from your sleeve, wrap it around the top of the knot of your braid to your bag. Do this until you are sure it is pretty secure. Next, double knot the strand. (make sure you end up wrapping the fabric until you can double knot it facing the inside of your bag). Do the same to the other side of the bag


Voila! You're finished!

Here's how the bag looks like hung up

Another bag I made

A smaller version of the bag (I made it with a medium-sized t-shirt)

So next time you find yourself overwhelmed by a pile of unused t-shirts-fear no more! This project is a great way to recycle old clothes. You can use these bags for laundry, sleepovers, or even groceries (line your bag with a stronger fabric or an extra tee if you plan on placing heavy items in it).

Feel free to leave comments or e-mail me if you have any problems or questions! Also, I'd love to see your finished projects so be sure to send me a pic of your final product.

3rd and 4th Meeting

Sorry for not updating in a while, but I'll make up for it with details of our great past two meetings!


Third Meeting: T-Shirt Reconstruction
The third meeting at Starbucks was awesome! We all had a fun time restyling our old t-shirts and eating delicious cupcakes.


Here is a list of projects that we worked on during the 3rd Meeting:
a t-shirt bag (be sure to check out the tutorial)
a cute braided headband with a flower applique
and finally, a very easy and versatile fringe scarf, courtesy of a free tutorial provided by psimadthis.com (check out her website and book for stylish and no-hassle tutorials).


Here are some videos of the step-by-step process of making the scarf and the rose applique (look for the flat rose tutorial) for the braided headband:


Fourth Meeting: Totoro Sock Animals
Next meeting, we were joined by three new members! Yay! The project we worked on was an adorably easy-to-make Totoro Sock Animal based on this tutorial.
We munched on some brownie-bites (thanks, Jinny) while sharing a few random stories. Some members even thought of great improvisations for their sock animal-some decided to make cats or bunnies!


Until next time!

Wednesday, January 26, 2011

Reminder for Members:

Our weekly meeting will take place on this Friday, not Thursday, and we will be meeting at Starbucks at the Village. It will probably end around 4:00. As you've read in the text I sent you, I will list the things you need to bring for tomorrow projects:

-1 L or XL t-shirt
-1 t-shirt of any size
-1 elastic hair band
-1 light weight, cotton-blend t-shirt
-and of course, your kits

Here's a preview to some things we will be making:


Can't wait to see you there!

Saturday, January 22, 2011

2nd Meeting: Yo-Yo's

Second meeting was full of sewing, talking, laughing, Zingers (a chocolate snack cake), and music powered by Brianna's handy-dandy iPod speaker.

For this meeting, we learned how to sew yo-yo's and recieved materials for constructing a felt heart brooch.

Yo-yo's are an easy applique that looks kinda like a scrunched up circle. Not only are they super easy to make, they require nothing but some scrap fabric (you can try old clothes) and a needle and thread. Here's some pics since I highly doubt my blatant description did this adorable and versatile applique justice:

They are very easy to make and look great in different colors. Here's a great step-by-step tutorial.

The possibilites are endless! Just adding yo-yo's to anything will guarantee an awesomely updated look


Unfortunately, I lost track of time with the yo-yo's so the club couldn't get started with the heart brooches. Each member received the materials in order to make the brooches at the end of the meeting. I finished mine that very night-perhaps it was the guiltiness of not starting on it earlier. This is the outcome of my brooch:

The brooches were based on this tutorial. It's really easy and pretty self-explanatory. It may take a while to make, especially if you're a beginner sewer like me, but it's definitely worth it.

Below are some pictures of the meeting, courtesy of Ms. Mitchell with her iPhone and its cool camera effects


until next week :)